Showing posts with label dollhouses. Show all posts

Wednesday, February 29, 2012

Diorama Update Plus New Cupcake Cottage Dollhouse!

Today's the day! I'll be installing my miniature diorama at Green Bean Books this afternoon. I'll be putting up a brand-new miniature scene, and it's a big secret until the unveiling! I'll show it to you in an upcoming blog post. Now, on to some exciting dollhouse news! ;-)

Cupcake Cottage dollhouse dreams!

I won this Greenleaf Storybook Cottage dollhouse kit on eBay for a steal. I was so happy, because I've been wanting to make a girlie shabby chic bakery for a while now, and this house will be perfect for it! I've been calling it "Cupcake Cottage" in my mind for months now. :-)  I'm thinking something like Shop Cinderella Moments (this post) meets Once Upon a Time (this post) meets Knotty By Nature (this post) and Petitevictorianrose (this post)!

It won't be red--it'll be cupcake frosting pink!

I'm still in the dreaming stage, but Cupcake Cottage has wanted to express itself for a while now, so I have a pretty good idea of where I'm going to go with it. It's all about vintage, pink, shabby chic, girlie fun!!!

Once I create the story behind the dollhouse (the who, what, where, when, and how of it), the dollhouse will almost create itself. At least that's what happened when I got that kind of clarity around the Lovers Cottage, with the help of some fantastic comments from all of you. :-) Until next time.... xoxo Jennifer

Tuesday, December 27, 2011

Solution to a Dollhouse Problem

I had a big problem. You may remember that Dad's Dollhouse was built from a 1970s Sunset magazine plan. It was designed for a child (which I was!), not for an adult miniature enthusiast. The front door and windows were not in 1/12 scale. Dad and I never got around to putting a front door on the place (too busy with other dollhouse projects!), and the open doorway was 7 1/2 inches (19 cm) tall (equivalent to 7 1/2 feet or 2.3 meters in real life)! If you look at the second photo in this post about Dad's Dollhouse, you'll see that open doorway.


When I came back to the dollhouse a few months ago, I started looking for a solution to this decorating dilemma. There were no manufactured doors, including screen doors, that would fit the doorway, so I figured that my only choice would be to make my own door. Then one day it just struck me in a flash of inspiration that once I made the door, it would look too big in comparison to the 1/12 scale miniature furnishings.


That's when it hit me: I could treat the doorway like a window, put curtains on it, and build a piece of furniture to mostly cover the window opening. And I knew which piece of furniture I wanted: the Chrysnbon parlor pump organ kit. Why the organ? Because we had one in my childhood home in the room we called the parlor, which was wallpapered in the same paper you see in the two above photos.


So I ordered the kit and put together the organ (which took several days to complete!), and then it was time to make curtains. I had been gathering small-scale lace, most of it vintage, just for this purpose. I was on a deadline, too, because I wanted to take some photos of the parlor for my most recent post, Christmas at Dad's Dollhouse. But it all came together in the nick of time, and I'm happy with the results.


Have any of you had a dollhouse or miniatures decorating or other problem that you needed to solve? If so, what was the problem, and how did you solve it? I'd love to hear about it. Until next time.... xoxo Jennifer

Thursday, December 8, 2011

Beautiful Mini Blessings Prizes Plus Shabby Chic Cottage Update

I received Kathi's Beautiful Mini Blessings giveaway prizes late Monday afternoon, and boy, did she spoil me rotten! Not only did she send these amazing beauties (all made by her!),


but she also sent all of these extras! Fabrics, ribbons, lace, a shelf, a hutch, and a bunch of cute dollhouse miniatures! There's a tiny pink flamingo leaning against the hutch--so cute!


And this photo is a close-up on a darling dollhouse book and a bunch of lovely mini magazines. Wow--I'm thrilled! Thank you again, Kathi! I love everything! :-) You all might want to be following Kathi's blog now so you can enter Kathi's next giveaway! ;-) Besides, her blog is really fun!


I'd been doing some work on my new shabby chic cottage in anticipation of receiving Kathi's prizes. I wasn't sure the flocked white Christmas tree would fit in Dad's Dollhouse with its Victorian decor, but I figured the tree would look really nice in a shabby chic environment. So I've done a little bit to the house, which as you may remember, arrived in pieces from Greece.

First, I removed two small areas of wallpaper in the attic:

Wallpaper before

I did some research online and found the suggestion to lay a hot steamy wrung-out cloth on the wallpapered walls before scraping off the loosened wallpaper. It worked, although it took several tries to get the wallpaper and ALL of the glue off. Patience was the key word! :-)

Wallpaper after (no wallpaper--yay!)

After I removed the wallpaper, I gave most of the pieces a first coat of gesso. So that's how I got the pictures of Kathi's prizes above. I removed the wallpaper, I painted the inside walls of the house with gesso, and then I leaned the house walls together long enough to take some photos (!). Next steps will be more painting and then wallpapering--yikes! If anyone has wallpapering tips for me, please do share! Until next time.... xoxo Jennifer

Monday, December 5, 2011

Where Have All the Dollhouses Gone?

I've gotten rid of some of my dollhouses. Bought with hopes for future fun, several of them looked different once I came out of my buyer's fog. ;-) I'd mentioned in a previous post that I was having second thoughts about the first house I bought, the one I called My 1970s Dollhouse:


It was made of old particle board, was heavy, and wasn't to scale. It was more of a child's dollhouse and needed redecorating. I decided to donate it to a charitable organization, along with this one:


It was also a child's play dollhouse. I found it in pieces at a thrift store for $5. Once I got it home, I realized it wasn't the antique dollhouse I had imagined, so I cleaned it and put it together, and took a couple of photos of it in the back of my truck before I hauled it away for donation along with the 1970s dollhouse.

The third dollhouse I want to mention is the one that also was a 1970s dollhouse, but I called it My Shabby Chic Cottage. Again, I had high hopes for this one. It had "good bones." It was a to-scale dollhouse miniature collector's house with siding, hardwood floors, and a beautiful staircase. The problems for me were that it was heavy, it took up a lot of space, and it needed a lot of work (mostly wallpaper removal). I also didn't care for the fact that the rooms were really deep from front to back of the house.


Finally, after hemming and hawing about what to do with it, I decided to sell it. I sold it last weekend to a mom who wanted to work on it with her daughter. I sold it for what I paid for it, but I kept all the furniture and family (also kept all of that from the 1970s dollhouse too!). So, I feel I've come out ahead. The furniture and families are worth more than what I spent on all of the houses, and I know I'll use more of the furniture (besides what I've already used in Dad's Dollhouse) in future projects.

Now I have two dollhouses left. There's Dad's Dollhouse (did you notice the new link at the top of my blog that takes you to a page with ALL of the Dad's Dollhouse posts?), and there's also my new Shabby Chic Cottage, the one I won from Tam toum's giveaway. I like that this house is compact and lightweight. Next post I'll show you some work I've been doing on it. Until next time.... xoxo Jennifer

Saturday, November 5, 2011

Recent Giveaway Wins!

I can't wait to show you some recent prizes I won and to introduce you to the artisans who created them. I am so grateful to each of these people and so in awe of their work, both plushy and miniature. So, on to the prizes!

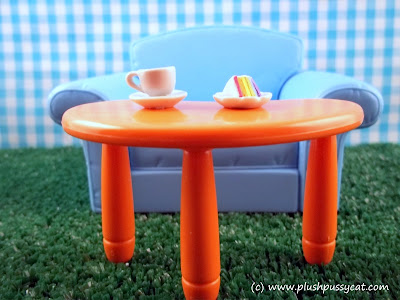
First, I'd like to show you what I won from Miniatures @ I.Love.Little.Things in Singapore. I provided some feedback when asked, and was then awarded two cute minis: a cup of tea in 1:6 scale and a piece of rainbow cake in 1:12 scale. Look at how cute they are:


Thank you ilovelittlethings! Your the best! :-)

Next, I received the cutest plush anime kitty kit from jennylovesbenny. Jenny makes the sweetest little bears and other cute plush critters and sells patterns and kits too. The complete kit I won, for making "Boots," came all the way from Australia and includes beautiful mohair, cotter pin joints, German glass eyes, instructions, patterns, and more! Isn't Boots adorable?!


Next, I received (from Greece!) Tam toum's semi-completed Greenleaf Primrose dollhouse that I won from the Miniature Stuff blog giveaway. Sadly, the dollhouse arrived in pieces, but thankfully all the pieces are there! The windowboxes and shutters mostly fell off, and the structure came apart, but nothing is really broken! This isn't a bad thing, actually, because it will make it easier to paint and decorate before I put it back together--woohoo! :-) Here's how the house looks now, before I do any decorating:


Finally, I won a lovely e-pattern from Gingermelon Dolls. She makes the cutest cute kawaii-inspired plushies! I just adore her particular spin on them. The e-pattern I won is for making these cute Bunny Babushkas:


OK, that's it for my prizes for now. I hope you've discovered at least one new artisan whose blog or work you would like to check out. Until next time.... xoxo Jennifer

Sunday, October 16, 2011

I Won! Plus Giveaway Ends Today!

Wow! I just learned that I won Tam toum's incredible giveaway! Look what I won:


It's a house! Can you believe it?! I am so excited! This looks like just the right size for my next project, because I was feeling a little bit overwhelmed when I thought about refurbishing the shabby chic dollhouse I bought recently. Thank you, Tam toum! Be sure to check out her blog, called Miniature Stuff, which shares lots of fun miniature videos and articles from around the globe!


While I'm here, this is the last day to enter my Fall 2011 Giveaway. The giveaway closes tonight at midnight Pacific time. I will number the giveaway entries (your comments), and then I will use a random number picker online to pick the lucky winner. I will announce it tomorrow--yay! Good luck everyone! My next giveaway will open later this week, so keep your eyes on this blog! :-) Until next time.... xoxo Jennifer

Monday, August 22, 2011

Dad's Dollhouse Study--An Update

Dad's Dollhouse is almost finished--woohoo! You heard me right--I am getting close to finishing the refurbishing of Dad's Dollhouse. I showed you recent pictures of my dollhouse's sewing room. Now here are some pictures of the room right next door--the study. Notice how I moved the lamp that I didn't like in the sewing room into the study. I like it better here, but I'm still not sure:


The chair is my first miniature, bought somewhere between age 8 and age 10 for $4.20, if I remember correctly. It is a spring rocking chair and is covered in the softest velvet ever. I originally bought it for my dollhouse's livingroom, but it doesn't work well there, so it is here. I wanted to be sure to include it, since it was my first miniature bought for this house (on a sweet outing with my mother).


I fell in love with this mini metal typewriter at a shop in Vancouver, Washington. I guess when I was younger it was a little fantasy of mine to be a writer, so this study with its typewriter fulfills that fantasy for me. I also love a comfortable place to read a book, and between the soft chair and the bookshelf full of books, my needs are well covered.

Now that I'm seeing these photos, however, I see a couple of things that are missing. First, I need to fill the nooks in the desk as I find appropriate items, such as a fountain pen and an ink bottle. Second, there definitely needs to be a cat sleeping on the chair. How could I forget something so obvious?! I love having a cat on my lap while I read. :-)


Of course I love getting mail, especially foreign mail. I had pen pals from several different countries, both as a child and as a young adult. Now with all of the friends around the world who share my interests in miniatures, plushies, and cute things in general, my needs in this area have been completely fulfilled. :-)

Speaking of foreign mail, a few minutes ago I received a lovely package from Carmen in Spain! I won a prize in her giveaway just last week, and now here it is! I will write about her lovely gifts in my next blog post. Until next time.... xoxo Jennifer 

Monday, August 15, 2011

Gifts from Drora Plus Sewing Room Update

I never cease to be amazed at the kindness and friendliness of the miniaturists I have met online. It is something I am most grateful for!

Recently, I commented on a lovely sewing basket that Drora had made and then featured on her blog, Drora's minimundo. Soon after I left my comment, Drora sent me a message that she had a second one and would mail it to me. I was so touched! The postal delivery took longer than either of us expected, but that just increased my anticipation, as I looked for the postal delivery worker every day. Finally the package arrived, and I was actually moved to tears at Drora's thoughtfulness.


Not only had Drora sent a sewing basket, but she had also included these beautiful items: two teapots for the hat shop/teashop that I am planning for my newest dollhouse; a Chinese vase with beautiful yellow flowers; and a seashell collage made from precious tiny seashells from the Sea of Galilee.

As if these were not magnificent gifts all on their own, here is Drora's masterpiece, the miniature sewing basket that I had originally commented on:


It is full of tiny spools of thread, a pair of gold scissors, tiny button cards, and mini lace. Isn't it amazing?! Thank you, Drora! You are so very kind and so very talented! I am lucky to count you as a friend. :-)

OK, now that we are in my dollhouse sewing room (in Dad's Dollhouse), I thought I would give a little update on it. Here's where it is today:


Now that I'm looking at this photograph more closely, I see two things I want to change. First, I need to change the lamp to something more feminine and Victorian. I plan to make some lamps and chandeliers from beads and jewelry findings in the very near future.

Second, I just made the chair shown in the above photograph from a Chrysnbon kit. I changed the fabric from what looked like a cheap black polyester blend to a piece of burgundy-colored cotton velvet. I'm not, however, happy with the stain that came with the kit. I want to re-do the color with a mahogany finish to coordinate with the sewing machine table. Another project! :-)

Now, here's a close-up on a little scene in the sewing room:


The cat is absorbed in his own reflection in the full-length mirror. He is so absorbed that he doesn't even notice the mouse right under his nose! Next time you see my mini sewing room, it may be all torn apart as a result of the cat chasing the mouse! ;-) Until next time.... xoxo Jennifer

Thursday, July 28, 2011

New Dollhouses: My Shabby Chic Cottage

Remember when I said that I'd found two dollhouses recently? I told you about the 1970s dollhouse that I'm planning to refurbish and possibly sell. Now here's the dollhouse that I plan to turn into a shabby chic cottage-like house:


My husband and I were heading out of our neighborhood a few weeks ago, when I saw an "estate sale" sign. When we got there, my husband headed to the lower level of the house, while I stayed in the first room I walked into, on the upper level.

Within a couple of minutes, my husband came back upstairs and waved to me to follow him. He said that he had something to show me. I followed, and when I got to the bottom of the stairs, there was this dollhouse and a box of furniture, all included, for $50. I was thrilled and mouthed the words "Thank you!" to my husband. In the end, my husband negotiated the price down to $43, so it was really a bargain! Here's the lowdown on this house:

Minuses:

1) It was filthy dirty inside and out. Insects, mice, and something bigger had all lived in it. Yikes! (I have cleaned it thoroughly, by the way. :-))
2) It is covered with wallpaper that will need to be removed.
3) I'll need to wallpaper it and finish it with moldings.

Pluses:

1) It is made from wood, not particle board.
2) It is 1/12 scale.
3) It has a front door (not currently attached), windows, a stairway, and hardwood floors!
4) The outside is covered with siding and a shake roof.
5) Lots of nice furniture and accessories were included.
6) The price was very reasonable! Yay!


I plan to turn it into a shabby chic cottage-like house. It will be fun to "distress" the floors and some of the furniture. Right now it kind of looks like a haunted house, with the torn wallpaper, but that's not really my style, so shabby chic it is!


Downstairs, in what would be the livingroom, I will turn it into a shop, either a book shop or a ladies' hat shop--I haven't decided. Tea will be served in the shop as well, so the kitchen next door will have the accoutrements for serving tea and pastries to the customers. The upstairs I plan on being living quarters for the shopkeeper--fun! All in shabby chic--yay!


Look at all that furniture, including a brass bed--woohoo! Check out the groovy 1970s family I got with this house too! The father is wearing bellbottom pants and a nylon shirt. The mom is wearing an Indian skirt. I love it!

So that's my second "new-to-me" dollhouse. I am really looking forward to finishing the 1970s house so that I can get to work on this shabby chic house. Until next time.... xoxo Jennifer

Friday, July 8, 2011

New Dollhouses: My 1970s Dollhouse

I recently had the good luck to find and purchase a couple of used dollhouses. The first one was listed on Craig's List, a web site for buying and selling items locally. This house turned out to be a child's dollhouse from 1978 with two shoeboxes full of dollhouse furniture and accessories included.


Minuses:
1) Not a 1/12 scale dollhouse. It's just a little bit bigger, like my Dad's dollhouse.
2) No front door, no windows, and no stairway.
3) Made from particle board instead of hardwood.

Pluses:
1) Unfinished inside, so I can finish it to my liking.
2) Includes two boxes of 1970s dollhouse furniture and accessories worth much more than what I paid for everything.
3) Lightweight and not too big--good size for a simple project.
4) Price. I got it for $30!

As you can see, the outside is pretty clean. There are just a few missing shingles that I'll have to replace. The yellow shutters are cute. I'll add a front door to it.

Inside, I plan to do a white basecoat all over, except in the children's bedroom, which is already wallpapered in a fabulous funky 1970s red and white gingham paper.


After the basecoat, I'll wallpaper the inside of the house with funky 1970s-style wallpapers and cover the floors with colorful matching felt. I even found a brown fuzzy felt that looks like shag carpeting! Super fun!


The furniture and accessories that came with the house are great! I've moved a few of the pieces into my Dad's dollhouse. The rest of the pieces are so 1970s fun and funky!

The kitchen has a ceiling lamp from that era (currently sitting on the table in the picture below), a cute radio on the counter, and a metal painted dish set in the cabinet.


The livingroom has a modern-style fireplace, the bookcase with books that I always wanted as a child (yes, the same exact model!) with separate blocks of wooden books that slip into each shelf of the bookcase, and my favorite find (which actually came with the second dollhouse I'll tell you about later), this 1970s stereo turntable with record and disco record album sleeve. Isn't it cute?!


As you can see, there is a miniature family (mom, dad, two older kids, and one baby) from 1978 too! When I complete the house, I may sell it to someone who appreciates vintage retro style or who has a child who would enjoy playing with it. I'm really looking forward to decorating the walls and floors of this dollhouse in the style of that era. Maybe it takes me back to my childhood a little bit! Fun! ;-)

So that is the grand tour of the first dollhouse I bought, which I'm calling the 1970s house. Next, I'll show you the second dollhouse I bought and tell you what I intend to do with it. More fun! Until next time.... xoxo Jennifer

Friday, June 24, 2011

Rosamargarita's Tiny Dress

A few weeks back, I was lucky enough to win a beautiful miniature hand-crocheted dress. I saw the post on Rosamargarita's blog, La Tapatia. She showed beautiful plants in  her garden, and then "surprise," there was a beautiful pink flower on one of the plants. But the flower wasn't really a flower, it was a beautiful ruffled dress that she had made herself.

I was the first person to comment about it, and then Rosamargarita announced that it was mine! Wow! I was thrilled. She mailed it to me all the way from Guadalajara, Mexico, so it took several weeks to arrive. I was so excited when the package finally showed up in my mailbox. I immediately put the tiny dress on my mini teddy bear. Here is "Teddy" modeling the dress:


Can you believe all of the teeny tiny stitches needed to make all of those teeny tiny ruffles?! It is very fine work, and done so perfectly! To give you better perspective on the size, here is Teddy wearing the dress inside the heirloom 1:12 dollhouse (Dad's Dollhouse) that I am refurbishing:


See how tiny it is?


Thank you, Rosamargarita! I am in awe of your beautiful work. You are an artist and a good friend! Big hugs! Until next time.... xoxo Jennifer

Tuesday, April 26, 2011

Dad's Dollhouse: An Update

Since I last wrote about the miniature dollhouse my dad built for me when I was a girl, I've been inspired to complete some work on it. I always had grand plans for my dollhouse--plans that my pocketbook could never accommodate! The height of my interest in the dollhouse (until now!) was probably from age 8 to age 16, and I never had enough money to do what I wanted with it. I still don't! :-)

Now, however, I can see the project from an adult's perspective, and I really want to finish some of the things I started on it.

My previous photos showed the dollhouse empty. Since then, I gave it a thorough cleaning and set up my existing miniature furniture and accessories. Plus, I got some birthday money, and just like when I was a kid, I put it all toward the dollhouse. Yesterday I put in a big order to complete some of my empty spaces. I can hardly wait to receive my package!

Here are some current photos showing where my dollhouse is today:


Here's my miniature Victorian country kitchen (with a few extras). The lamp and T.V., which I picked up at a flea market and the Goodwill bins respectively, are not of the era. I think I've decided that with this dollhouse, since it is a family heirloom and not a true-to-scale "masterpiece," I'll be flexible on what goes in it. :-) By the way, I got the china cabinet pictured above at the Goodwill bins recently too.

I've always wanted to complete the kitchen with a country kitchen ice box, so that is one of the things I've ordered for the house. I think it will go in the corner next to the china cabinet. There are also dishes, potholders, and more coming--yay!


Here's my little Victorian livingroom, set up for Christmas. Like the kitchen, it is wallpapered with real wallpaper from my childhood family home. The wallpaper is not to scale, but it means a lot to me. I want to put a fireplace where the couch is now, and I want to add a front door (I have the hinges!) and curtains (I want to put curtains in all rooms with windows). I also want to change the carpet to something that is more to scale (this pile is at least 1/2 inch thick, so it looks like a raised livingroom!).


Here's the master bedroom, with wallpaper from my parents' bedroom. Oh, the "lovely" wedgewood blue and mauve of the late 1970s to early 1980s! I plan to change the carpet and put a quilt on the master bed, which I happened to find at the Goodwill bins recently. For those who don't know, you pay by weight at the bins. That bed probably cost me all of 50 cents! Not bad--miniatures on the cheap!


OK, here's my miniature Victorian bathroom. I recently purchased the rubber ducky at a flea market. I want to get some faux tile in this room, wallpaper, different towels, and of course, curtains. The fan on the windowsill was given to me by my grandmother, and it is probably from the 1940s.


Here's the child's bedroom, full of toys. I will change the carpet, fix up the bedding, add a toybox, and add more toys. Probably wallpaper it too!


This was always going to be the dollhouse attic. As a child, my plan for this room was to get a big old trunk and fill it with stuff. Slightly scary and fun at the same time! Now I plan to turn it into a sewing room, which is appropriate considering that the wallpaper in the room is from my grandmother's house. You see, Grandma was the one who taught me how to sew. And she gave me my first sewing machine, a 1965 Singer, which is still going strong.

I'm going to really have some fun with this room! The scissors are already there, as is the pot-bellied stove (an antique metal salt shaker my mom gave me). I plan on a basket with balls of yarn and knitting needles, lots of sewing notions, and an antique-style sewing machine (the latter is coming in my order!). 

Miniatures are turning out to be fun all over again! And while I'm finishing long-uncompleted projects in my dollhouse, I can use the same items in upcoming vignettes with my plushy critters! Double fun! Until next time.... xoxo Jennifer